Inject vs Provides vs Binds in Dagger and Hilt
July 23, 2020

There are 3 ways to add dependencies to your object graph when using Dagger or Hilt (which is built on top of Dagger):
@Inject-annotated constructors for classes.@Provides-annotated types in Modules.@Binds-annotated types in Modules.
But when should you use one vs the other?
TL;DR:
Use
@Injectfor code you own.Use
@Providesfor code you don’t own.Use
@Bindsfor injecting interfaces while generating less DI code.
@Inject
Using classes with @Inject annotated constructors should be your preferred approach whenever possible. For instance:
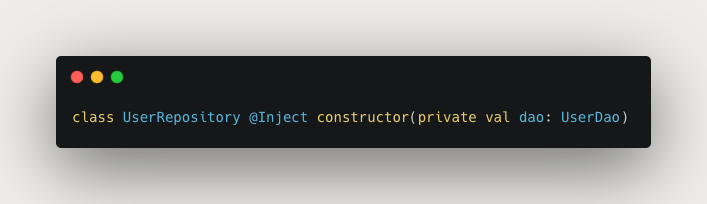
This makes UserRepository injectable as a dependency into other code.
@Inject annotation is a standard JSR330 annotation that adds your type to the dependency graph requiring only minimal amount of code. Inject being the standard annotation has a potential of making it easier to migrate to a different DI library at some point in the future.
However, @Inject annotation can only be used to annotate constructors that you have control over (i.e. in classes that you define yourself).
How do you add a class to your object graph if you are not the one defining this class? Let’s look at what @Provides does.
@Provides
Your @Module can contain dependencies annotated with @Provides. For instance,
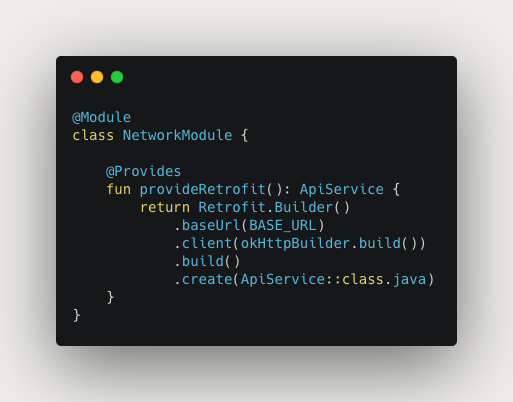
In the example above, we are making ApiService (Retrofit API) available to our object graph by using @Provides annotation in a @Module class. We are the consumers of the Retrofit API and the contract that is given to use is a Builder pattern—we cannot annotate any Retrofit API constructor with an @Inject annotation. Therefore, using the @Provides is our only option here.
Note: instead of using the @Inject annotation for UserRepository class above, we could add this dependency to the object graph by using the @Provides method. This would definitely work, but it introduces unnecessary boilerplate, generates more code such as Module Factory classes for all your dependencies which in turn increases the method count in your .apk or .aab.
There are ways to circumvent this issue:
Defining
@Moduleas anobjectto make the@Providesfunctionsstatic.Using
@Bindsannotation
@Binds
You cannot annotate interfaces with @Inject since interfaces don’t have constructors. However, if you have a one-to-one mapping between an interface and implementation, you can use @Binds to make an interface injectable. Injecting an interface (rather than a concrete implementation) is always a good practice for several reasons including ease of testing. For instance,
Now you can inject an interface as a dependency like so:

Admittedly, the @Binds syntax is not very intuitive and the same result could be achieved by using @Provides like so:
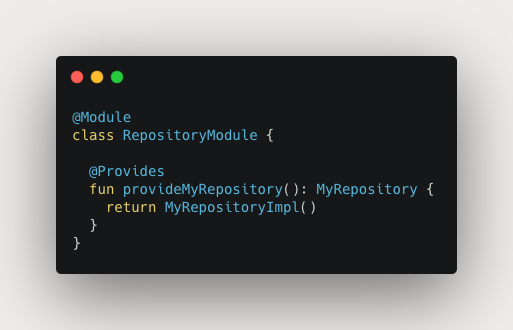
However, the advantage of using @Binds is that it reduces the amount of code generated (such as Module Factory classes). Less code to generate means the Kapt plugin has less work to do which can speed up build times in larger projects.
@Binds is a very specialized annotation though—it’s used to map an interface to an implementation. It can take only a single parameter and the type return is the interface implemented by the given parameter object.
If the implementation you are binding to takes constructor parameters, you can use a combination of @Inject and @Binds as shown in the example below:

Conclusion
The principles described above are applicable to both Dagger and Hilt.
Hopefully this guide will make the decision of how to provide your dependencies a little easier. As always, if you have any questions or comments, feel free to reach out.